How to Separate Brisket Point and Flat
TheGrillingMaster.com is reader-supported. If you buy something using the links on our site, we might earn an affiliate commission at no added cost to you. This helps us pay our staff to keep making awesome content for you!
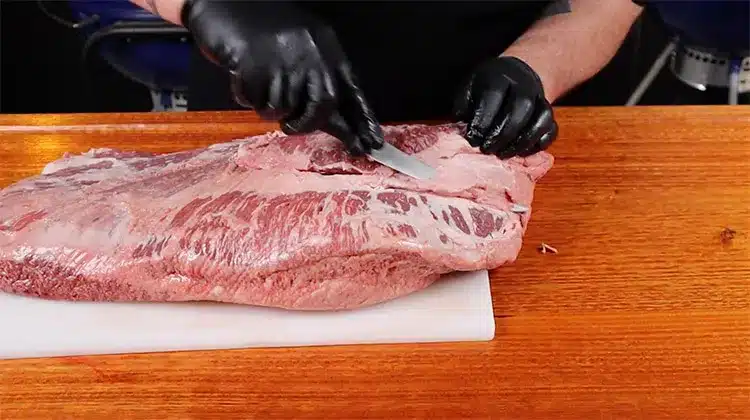
Brisket is a delicious and popular cut of beef that is often used for smoking and barbecuing. It consists of two parts: the brisket point and the brisket flat. These two parts have different textures, fat content, and cooking times… which is why it’s essential to know how to separate them properly. In this article I will guide you through the steps of separating brisket point and flat like a professional.
Tools you will need
Before you start separating the brisket point and flat, make sure you have the following tools:
- A sharp boning knife
- A cutting board
- A pair of kitchen shears
- Gloves (these are optional)
Step-by-Step Guide to Separating Brisket Point and Flat
Step 1: Trim the Brisket
Start by trimming the brisket of any excess fat or silverskin. This is an important step when it comes to preparing your brisket flat.
This will make it easier to see the separation point between the brisket point and flat.
Use your kitchen shears or a sharp knife to remove any loose or hanging pieces of fat.
Step 2: Locate the Separation Point
The brisket point and flat are connected by a layer of fat known as the “fat cap.”
You will need to locate this fat cap and use your boning knife to separate it.
Turn the brisket over so that the fat cap is facing up.
Look for the line of fat that separates the point and flat.
Step 3: Cut through the Fat Cap
Use your boning knife to cut through the fat cap while following the separation point that you identified in step 2.
This will require some precision and patience – and honestly it will take a some practice to get this step just right so don’t worry too much about it the first time you try it.
Make sure to cut all the way through the fat cap! But also be sure not to cut into the meat of the brisket.
Step 4: Separate the Brisket Point
Once you’ve cut through the fat cap use your hands to pull the brisket point away from the flat. This is why some people like to use gloves.
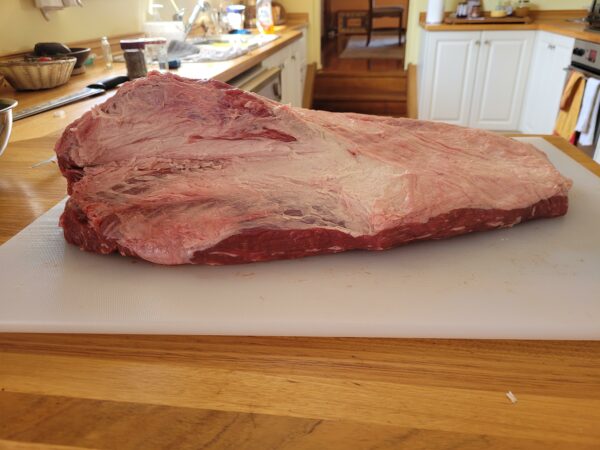
You may need to use your boning knife (or any fine sharp knife you have in your kitchen) to separate any remaining connective tissue. The point will have a lot more fat than the flat. This is why it’s often referred to as the “fatty” part of the brisket.
Step 5: Trim the Brisket Point
Now that you’ve separated the brisket point it’s time to trim any excess fat or connective tissue.
Use your kitchen shears to remove any loose or hanging pieces of fat and then trim away any remaining connective tissue.
Step 6: Separate the Brisket Flat
After you’ve trimmed the brisket point next it’s time to separate the flat. You’ll notice that the flat is much leaner than the point. Use your boning knife to separate the flat from the remaining fat cap and any connective tissue. Pull the flat away from the remaining fat cap and any connective tissue using your hands.
Step 7: Trim the Brisket Flat
Once you’ve separated the brisket flat you will want to trim any excess fat or connective tissue (I am sorry if these instructions feel repetitive at this point!). Use your kitchen shears to remove any loose or hanging pieces of fat and to trim away any remaining connective tissue.
In Conclusion
Separating the brisket point and flat can seem like a daunting task… but with the right tools and a bit of patience it’s a straightforward process. Understanding the differences between the two parts of brisket and knowing how to separate them properly will help you cook the perfect brisket every time. With these steps you are well on your way to mastering the art of smoking and barbecuing brisket! Enjoy.
Learn More About Grilling
If you want to learn more about grilling, check out these other helpful resources!

Kevin Turner
Hi there, I'm Kevin Turner, Founder and CEO of thegrillingmaster.com. I started this website to share my passion and knowledge with you. You can leverage my years of experience as a pit master and professional to grill great food!
About The Grilling Master
Hi there, I'm Kevin Turner, Founder and CEO of thegrillingmaster.com.
My passion has always been grilling, smoking and BBQ delicious meats that satisfy my inner carnivore!
I started this website to share my passion and knowledge with you, the hungry reader who wants to prepare the perfect meal.
You can leverage my years of experience as a pit master and professional.
Send me a message and let's connect on Twitter here.
