How Much Charcoal to Use in a Grill: A Comprehensive Guide
TheGrillingMaster.com is reader-supported. If you buy something using the links on our site, we might earn an affiliate commission at no added cost to you. This helps us pay our staff to keep making awesome content for you!
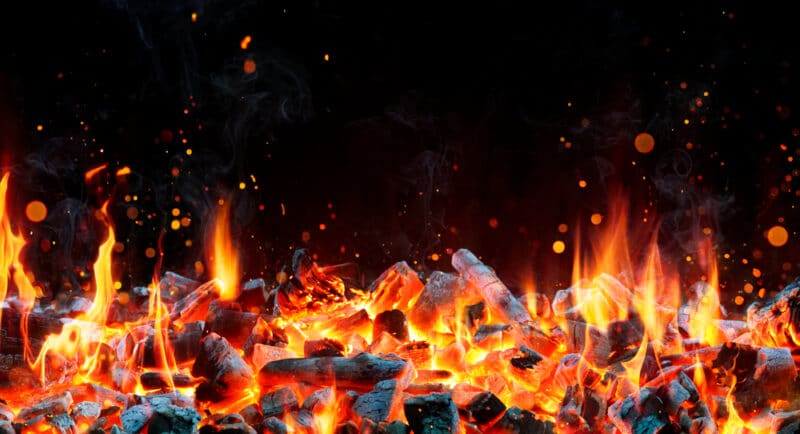
When grilling, the amount of charcoal to use depends on the grill size, desired cooking temperature, and type of food. For a standard charcoal, starting with 2-3 pounds (about 30-40 briquettes) is recommended for general cooking. Adjust based on your specific needs, considering factors like cooking duration and technique. Always ensure even heat distribution and monitor temperature.
Grilling has always been a cherished ritual for me, a dance of flames, aroma, and flavors. But one question that often stumped me in my early days was, “How much charcoal should I use?” It might seem trivial, but the right amount of charcoal is the heartbeat of a successful BBQ session. Too little, and you’re left with undercooked meals; too much, and you risk scorching your dishes.
Over the years, I’ve learned that mastering the art of charcoal measurement is crucial. In this guide, I’ll share insights from my grilling journey helping you strike that perfect charcoal balance every time.
Types of Charcoal
Each type of charcoal brings its own flair to the grilling experience, influencing flavor, heat consistency, and burn duration. Here’s a breakdown of the main types I’ve encountered:
Lump Charcoal:
- Nature of the Beast: Lump charcoal is essentially charred hardwood pieces. It’s the most natural form of charcoal I’ve used.
- Pros: It lights up faster and burns hotter than its counterparts. The authentic wood flavor it imparts to the food is something I absolutely love.
- Cons: It tends to burn out quicker, and the inconsistent sizes of the lumps can sometimes make it challenging to gauge the exact amount needed.
Briquettes:
- What’s in a Name?: Briquettes are compressed blocks made from a mix of charcoal dust, binders, and other fillers.
- Pros: They offer a more consistent burn rate and size uniformity, making it easier for me to measure and maintain steady temperatures.
- Cons: Some briquettes can contain additives that might influence the flavor of the food. I always recommend checking the label and opting for natural, additive-free versions.
Specialty Charcoals:
- Flavored Briquettes: Over the years, I’ve come across briquettes infused with flavors like mesquite or hickory. They can add an extra layer of taste to the dishes.
- Coconut Shell Charcoal: A more eco-friendly option I’ve tried, made from coconut shells. They produce less ash and have a subtle, unique flavor profile.
Factors Influencing Charcoal Quantity
Over time, I realized that several factors play a role in determining the right amount of charcoal to use. Here’s what I’ve learned:
Size and Type of the Grill:
My compact portable grill, perfect for picnics, requires significantly less charcoal than my large backyard setup. The grill’s size directly impacts the amount of charcoal needed.
Additionally, certain grills, especially those with thicker walls or better insulation, retain heat more efficiently, requiring less fuel.
Desired Cooking Temperature:
Depending on what I’m cooking, the required temperature can vary. Searing a steak demands high heat, meaning more charcoal, while slow-cooking ribs at a lower temperature might need less.
I’ve learned to adjust my charcoal quantity based on the heat intensity I’m aiming for.
Duration of the Grilling Session:
For quick grilling sessions, like burgers or veggies, a small amount of charcoal suffices. But for longer endeavors, like smoking a brisket, I ensure there’s enough charcoal to sustain the heat.
I’ve often kept some extra charcoal on hand to add if needed.
Type of Food Being Grilled:
Thicker cuts of meat or whole poultry require a longer, more sustained heat, leading me to use more charcoal. In contrast, delicate foods like fish or thin vegetable slices cook quickly, needing less fuel.
General Guidelines for Charcoal Quantity
When I first embarked on my grilling journey, I often found myself either overwhelmed by the sheer heat or frustrated by a dwindling flame. It took many BBQ sessions, a few over-charred steaks, and some undercooked chicken to understand the nuances of charcoal measurement. It’s important you are using one of the best charcoal grills if you want the best outcome.
Over time, I’ve developed some general guidelines that have served me well:
Starting Point:
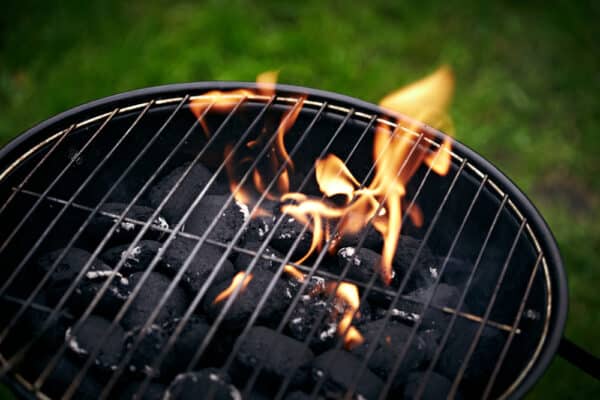
For my standard kettle grill, I’ve found that a good rule of thumb is to cover the bottom of the grill with a single layer of charcoal. This usually amounts to about 2-3 pounds or roughly 30-40 briquettes. It’s a baseline that’s suitable for most average grilling sessions.
Adjusting for Grill Size:
The larger the grill, the more charcoal it demands.
My spacious barrel grill, for instance, requires almost double the amount compared to my compact one.
However, it’s not just about filling it up. I’ve learned the importance of spreading the charcoal evenly to ensure consistent heat distribution.
High Heat vs. Low Heat:
When I’m aiming for a high-heat sear, especially for dishes like steaks or burgers, I add an extra handful or two of briquettes.
This ensures that the grill reaches those higher temperatures and maintains them for the duration of the cook.
On the other hand, for slow-cooked dishes or smoking, I might use a little less than my baseline, focusing on maintaining a steady, low heat over a longer period.
Duration Matters:
For quick 15-minute grills, the baseline amount usually suffices.
But if I’m planning a marathon BBQ session, I ensure I have extra charcoal on standby.
There’s nothing quite as frustrating as running out of heat midway through grilling a beautiful rack of ribs.
If you want to cook long and slow, I think you should use a charcoal smoker instead of a grill.
Experiment and Learn:
While these guidelines have been invaluable, I’ve also come to appreciate the importance of experimentation.
Different brands of charcoal can burn at varying intensities and durations. I’ve often adjusted my measurements based on the specific charcoal I’m using.
Keeping Notes:
One of the best decisions I made was to start keeping a grilling journal.
Every time I grill, I jot down the amount of charcoal used, the type of food, cooking duration, and any observations. Over time, this has given me a treasure trove of personalized insights, helping me fine-tune my charcoal usage.
Techniques for Measuring Charcoal
One of the most transformative moments in my grilling journey was realizing that precision in charcoal measurement could elevate my BBQ game. Over the years, I’ve experimented with various techniques, each with its own merits. Here’s a deep dive into the methods I’ve found most effective:
The Charcoal Chimney:
My charcoal chimney has become an indispensable tool in my grilling arsenal.
Not only does it ensure a consistent and efficient lighting process, but it also serves as a fantastic measuring tool. Typically, a full chimney holds enough charcoal for high-heat grilling on a standard kettle grill or 2-burner gas grill.
For lower temperatures or shorter grilling sessions, I fill it halfway. The uniformity it offers has taken the guesswork out of the equation for me.
The “Hand” Method:
In the absence of a chimney, I’ve often resorted to the “hand” method.
By this, I mean estimating the amount of charcoal based on handfuls.
On average, three to four handfuls serve as a good starting point for most of my grilling sessions. While it might lack the precision of other methods, with time and experience, my estimates have become surprisingly accurate.
Weighing the Charcoal:
For those special occasions where I’m aiming for perfection, I’ve gone the extra mile and actually weighed my charcoal.
Using a simple kitchen scale, I measure out the exact amount needed.
While it might seem a tad excessive to some, the control it offers is unparalleled, especially for dishes that require precise temperatures.
Visual Estimations:
Over time, as I became more familiar with my grill and the charcoal I prefer, I’ve developed a keen eye for visual estimations. Spreading the charcoal in a single layer at the base of the grill or piling it to a certain height has become second nature.
This method, honed by experience, has been my go-to for impromptu BBQ sessions.
Adjusting on the Fly:
Grilling, at its heart, is as much about intuition as it is about technique.
There have been times when, despite my best measurements, I’ve felt the need for more or less charcoal. Trusting my instincts and adjusting on the fly has often led to some of my best grilling outcomes.
In the end, measuring charcoal is a blend of science and art. While tools and techniques provide a framework, it’s the nuances of each grilling session that truly dictate the amount needed. I’ve learned to embrace both the precision and the unpredictability, finding joy in the process.
Adjusting Charcoal for Cooking Techniques
I’ve come to understand that grilling is not a one-size-fits-all endeavor. Different dishes and cooking techniques demand unique approaches to charcoal usage. As I honed my skills, I realized the importance of adjusting my charcoal layout and quantity based on what I was aiming to achieve. Here’s a glimpse into my experiences:
Direct vs. Indirect Grilling:
The first distinction I learned was between direct and indirect grilling. For direct grilling, where I’m cooking food directly over the flames (think burgers or steaks), I spread the charcoal evenly across the grill’s base.
This provides a uniform heat, perfect for quick-cooking items.
On the other hand, indirect grilling, which involves placing the food away from the direct heat source, became my go-to for larger cuts of meat or dishes that required longer cooking times.
For this, I’d pile the charcoal on one side of the grill, creating a hot zone and a cooler zone. This technique was a game-changer for dishes like whole chicken or roasts, allowing them to cook evenly without charring.
Slow Cooking and Smoking:
My venture into slow-cooked BBQs and smoking introduced me to the ‘snake’ or ‘fuse’ method.
I’d arrange the charcoal briquettes in a semi-circle or snake shape, placing wood chunks or chips intermittently. As the charcoal burned, it would ignite the adjacent briquettes, providing a slow and steady heat source.
This method, combined with the aromatic wood, gave my dishes that coveted smoky flavor and tenderness.
High-Heat Searing:
For dishes where I wanted a beautiful sear, like tuna steaks or thick beef cuts, I learned to create a concentrated heat zone. By piling more charcoal in a specific area, I could achieve those incredibly high temperatures needed for a perfect crust.
The key was to ensure the rest of the grill had fewer coals, allowing me to move the food away from the intense heat once seared.
Layered Cooking:
One of my favorite techniques, especially for multi-course BBQs, involved creating layers of heat.
By adjusting the charcoal quantity and layout, I could have areas of high, medium, and low heat. This allowed me to grill veggies, meats, and even some desserts simultaneously, each at its optimal temperature.
Safety Considerations
Grilling has always been a source of joy for me, a way to connect with nature, food, and loved ones. But intertwined with the sizzle of the grill and the aroma of charred meats is a responsibility to ensure safety.
I’ve had my share of close calls and lessons learned. Here’s my take on the essential safety considerations every griller should be aware of:
Avoiding Overfilling:
In my early days, eager to achieve the highest temperatures, I’d often overfill my grill with charcoal. I quickly realized this could lead to uncontrollable flames and potential flare-ups.
Now, I ensure there’s enough space for air circulation, preventing excessive heat and potential fire hazards.
Proper Lighting Techniques:
I’ve seen many resort to lighter fluid or even gasoline to ignite their charcoal.
While these might offer quick results, they can be dangerous and impart an unpleasant taste to the food. I’ve since adopted the use of a charcoal chimney or natural fire starters.
They’re not only safer but also ensure that my food retains its authentic grilled flavor.
Handling Hot Coals:
One lesson I learned the hard way was never to move or adjust hot coals with bare hands.
A misplaced coal once gave me a nasty burn. Now, I always use grill tongs or heat-resistant gloves when adjusting or adding charcoal.
Proper Ventilation:
Grilling in enclosed spaces can be dangerous due to the risk of carbon monoxide buildup.
I always ensure my grilling spot is well-ventilated, keeping both the grill and myself safe.
Ash Disposal:
Disposing of hot ashes directly into trash bins was a mistake I made once and never repeated.
I now ensure ashes have completely cooled down, often leaving them overnight, before disposal.
This prevents any accidental fires and ensures safety for both the environment and those around.
Regular Grill Inspection:
Over time, grills can wear down, leading to potential hazards. You need to clean your grill at least once a month if you’re using it often.
I’ve made it a habit to inspect my grill regularly, checking for any rust, loose parts, or malfunctioning vents.
This proactive approach has saved me from potential accidents on multiple occasions.
Keeping a Fire Extinguisher Handy:
While I hope never to use it, I always keep a fire extinguisher nearby when grilling.
It’s a safety net, ensuring that I’m prepared for any unexpected flare-ups or fires.
Grilling, for all its joys, comes with inherent risks. But with awareness, caution, and a commitment to safety, these risks can be minimized.
The Art of Experimentation in Grilling
When I first started grilling, I clung to recipes and guidelines as if they were sacred texts. Every step was followed to the letter, every measurement exact. But as the years went by and countless BBQs passed, I began to understand that grilling, at its core, is as much about experimentation as it is about precision.
One of my most memorable grilling experiences was a complete accident. I had run out of my usual hickory wood chips and, on a whim, decided to use some applewood chips I had lying around. The result was a flavor profile I had never imagined – a subtle sweetness that perfectly complemented the savory meats. It was a revelation, a happy accident that I would never have discovered had I not deviated from my usual routine.
This spirit of experimentation led me down paths I had never considered. I began to play with different marinades, often mixing contrasting flavors like spicy and sweet or tangy and rich. Not every experiment was a success, of course. There were a few dishes that even my ever-supportive dog turned his nose up at. But with each failure came a lesson, an understanding of what worked and what didn’t.
Temperature, I learned, was not just a setting but a variable to be played with. Slow-cooking ribs at a slightly higher temperature gave them a delightful crust, while searing steaks at a lower temperature than recommended resulted in a juicier interior. These were nuances that no recipe mentioned, insights gained only through trial and error.
But perhaps the most significant lesson I learned was about the importance of adaptability. There were times when unexpected rain showers threatened to dampen my BBQ plans. Instead of giving up, I learned to adjust, moving the grill to a sheltered spot or even experimenting with quicker-cooking dishes.
In the world of grilling, I’ve come to believe that recipes and guidelines are merely starting points. The real magic happens when you step off the beaten path, when you allow yourself the freedom to experiment and innovate. It’s a journey of discovery, where each grilling session offers a chance to learn, adapt, and create something uniquely your own. And as I stand by my grill, tongs in hand, I’m reminded that in grilling, as in life, it’s the unexpected twists and turns that make the journey truly memorable.
Learn More About Grilling
If you want to learn more about grilling, check out these other helpful resources!

Kevin Turner
Hi there, I'm Kevin Turner, Founder and CEO of thegrillingmaster.com. I started this website to share my passion and knowledge with you. You can leverage my years of experience as a pit master and professional to grill great food!
About The Grilling Master
Hi there, I'm Kevin Turner, Founder and CEO of thegrillingmaster.com.
My passion has always been grilling, smoking and BBQ delicious meats that satisfy my inner carnivore!
I started this website to share my passion and knowledge with you, the hungry reader who wants to prepare the perfect meal.
You can leverage my years of experience as a pit master and professional.
Send me a message and let's connect on Twitter here.


