How to Cook a Turkey on a Charcoal Grill: Delicious Outdoor Roasting
TheGrillingMaster.com is reader-supported. If you buy something using the links on our site, we might earn an affiliate commission at no added cost to you. This helps us pay our staff to keep making awesome content for you!
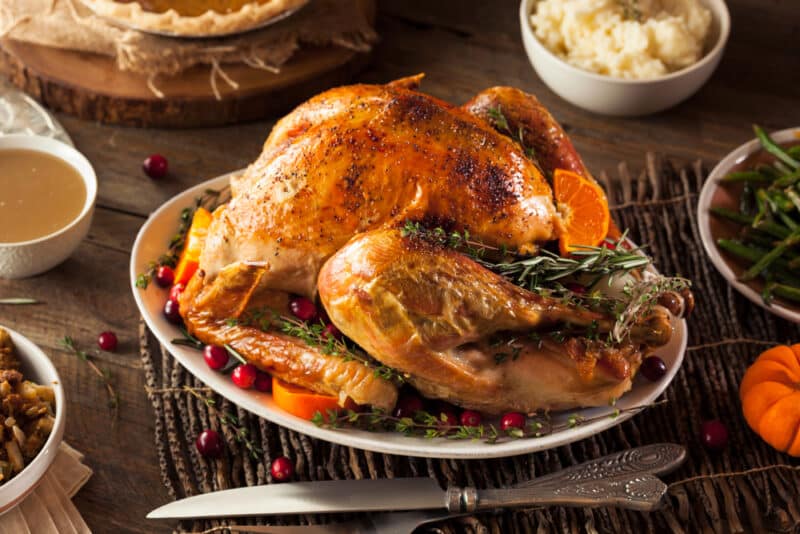
Grilling a turkey can feel like navigating uncharted waters, especially when you’re at the helm of a festive holiday gathering. The weight of expectation to present that perfectly juicy bird with gloriously golden skin is no small feat.
But take heart – after delving into various techniques and honing my turkey-grilling skills over fiery coals, I’m excited to share the secrets that lead to irresistibly moist meat encased in beautifully crisped skin each time you grill.
So let’s embark on this journey together and ensure your outdoor feast becomes etched in memory for all the right reasons!
Key Takeaways
- Choose a fresh, medium-sized turkey around 10-15 pounds for even cooking; remember to store it properly before grilling.
- Use essential equipment like a charcoal grill with indirect heat setup, plate setter, leave-in thermometer, and V-rack in a roasting pan for best results.
- Brine the turkey beforehand to enhance flavor and moisture; dress with herbs and butter or oil for crispy skin while maintaining consistent grill temperature prevents drying out.
- Keep the grill clean by lining the drip pan with aluminum foil and brushing grates after use; carve indoors for convenience and make gravy using drippings to complement your grilled turkey.
- Allow the cooked turkey to rest covered loosely in foil for 20 – 30 minutes so juices redistribute evenly before carving and serving.
Choosing the Right Turkey for Grilling
When selecting a turkey for grilling, it’s important to consider the recommended size and type for the grill. Safe handling and proper storage of the turkey are also crucial for a successful outdoor roasting experience.
Recommended size and type
I always go for a turkey that’s around 10-15 pounds when I’m planning to grill it outdoors. Larger turkeys can be difficult to cook evenly on the charcoal grill, and you might end up with undercooked or overcooked parts.
Medium-sized turkeys are just perfect; they fit nicely on the rack and cook through beautifully using indirect heat. For type, choose a fresh, not frozen, free-range turkey if possible because they tend to have more flavor and juicier meat after grilling.
Make sure you get a bird that fits your grill size too – there’s nothing worse than readying everything only to find out your turkey is too big! Fresh turkeys should also be pinkish in flesh color without any foul odors.
Go for natural or organic options since these typically lack added hormones or antibiotics which can affect taste and quality once grilled. Trust me, picking the right size and type of turkey makes all the difference for your outdoor roasting success!
How to safely handle and store the turkey
When handling the turkey, always wash your hands and any surfaces it comes into contact with to prevent cross-contamination. The turkey should be stored in the refrigerator at a temperature of 40°F or below.
Place the turkey on a tray or in a container to catch any juices that may drip, thus avoiding cross-contamination with other foods. Be sure to thaw the turkey safely by either refrigerating it for several days or using cold water changes if time is limited; never defrost at room temperature as this can encourage bacterial growth.
Always use separate cutting boards and utensils for raw meat to avoid cross-contamination with ready-to-eat foods. When marinating, ensure that all marinades are kept refrigerated during and after use to prevent harmful bacteria growth.
Necessary Equipment for Grilling a Turkey
To grill a turkey, you’ll need specific equipment such as a charcoal grill, plate setter, leave-in thermometer, and a v-rack or roasting rack with a roasting pan. These tools are essential for ensuring that your turkey cooks evenly and retains its moisture for a delicious outdoor roasting experience.
Charcoal grill
To grill a turkey on a charcoal grill, I start by setting up the grill for indirect heat. After that, I add water to the drip pan and place it in the center of the bottom rack. Then, I light enough charcoal to fill half of each side of my grill with one layer of coals.
Once the coals are hot and ashy, I pour them evenly into both sides of the grill. Make sure your turkey is placed on a stand or roasting rack over an aluminum drip pan.
After placing my prepared turkey onto the indirect heat side of the barbecue, positioned away from direct flames or any other heat source, close my lid immediately to begin roasting.
Plate setter
After setting up the charcoal grill, the next step is to prepare the plate setter. This essential piece of equipment helps to create indirect heat, which is crucial for roasting a turkey on the grill.
The plate setter effectively blocks direct heat from reaching the turkey while allowing hot air to circulate evenly around it, ensuring that the bird cooks thoroughly and evenly. This indirect heat method helps prevent flare-ups and ensures that the meat stays tender and juicy throughout the cooking process.
Once you have set up your plate setter in your charcoal grill, you are ready to move on to preparing your leave-in thermometer and V-rack or roasting rack with a roasting pan. These tools will help ensure that your turkey grills perfectly and turns out deliciously moist and flavorful.
Leave-in thermometer
I rely on my leave-in thermometer to ensure the turkey reaches the perfect internal temperature. This tool helps me avoid overcooking or undercooking, guaranteeing that my grilled turkey turns out juicy and flavorful every time.
When grilling a whole turkey, it’s essential to monitor its internal temperature throughout the cooking process. Placing a leave-in thermometer in the thickest part of the thigh allows me to keep track of the turkey’s progress without needing to open the grill often or guess when it’s done.
V-rack or roasting rack with roasting pan
To cook a turkey on a charcoal grill, using a V-rack or roasting rack with a roasting pan is essential. Place the rack in the roasting pan before putting the turkey on top, ensuring that it is elevated above the bottom of the pan.
This allows heat to circulate evenly around the bird while catching flavorful drippings in the pan for basting and gravy-making later.
When it comes to grilling your Thanksgiving turkey, investing in a V-rack or roasting rack with a roasting pan will help ensure that your bird cooks evenly and stays moist throughout the process.
Steps for Cooking a Turkey on a Charcoal Grill
Once the turkey is brined and dressed, I’ll guide you through preparing the grill, cooking the turkey with indirect heat, and allowing it to rest for a juicy and flavorful outcome.
Ready to grill your Thanksgiving turkey? Keep reading for all the steps!
Brining the turkey
To brine the turkey, submerge it in a solution of salt, water, and sugar. You can also add herbs and aromatics for extra flavor. Brining helps to tenderize the meat and enhance its juiciness. This process also adds flavor to the turkey before grilling.
- Submerge the turkey in a large pot or food – safe container.
- Combine cold water, kosher salt, and sugar in a separate container.
- Stir until the salt and sugar dissolve completely.
- Pour the brine mixture over the turkey until it is fully submerged.
- Add herbs, spices, and aromatics to the brine for added flavor if desired.
- Cover the container with a lid or plastic wrap and refrigerate for at least 12 hours.
- Remove the turkey from the brine, rinse it thoroughly under cold water, then pat dry with paper towels.
- The turkey is now ready to be dressed for grilling.
Dressing the turkey
After brining the turkey, the next step is dressing it. This step involves seasoning and stuffing the bird before it goes on the grill. Here’s how to dress your turkey for grilling:
- Prepare the seasoning rub by mixing your favorite herbs, spices, salt, and pepper in a bowl.
- Gently separate the skin from the breast of the turkey to create space for applying the seasoning rub.
- Rub the seasoning mixture under the skin of the turkey, ensuring an even coating.
- Season the outside of the turkey with any remaining seasoning rub.
- Stuff the cavity of the turkey with aromatics such as lemon wedges, garlic cloves, and fresh herbs to infuse flavor during grilling.
- Truss or secure the turkey legs and wings with kitchen twine to ensure even cooking and a uniform shape.
- Brush or spray oil over the entire surface of the turkey to promote browning during grilling.
- Your turkey is now ready to be placed on your prepared grill for a delicious outdoor roasting experience!
Preparing the grill
To prepare the grill, start by cleaning the grates and removing any debris. Next, set up a two-zone fire by arranging the charcoal on one side of the grill for indirect heat. Place a drip pan filled with water under the grates on the opposite side to catch drippings and maintain moisture. Position the plate setter or heat deflector over the charcoal to create a barrier between the coals and the turkey, ensuring even cooking. Then, preheat the grill to around 325-350°F (163-177°C) and add wood chips for flavor if desired. Finally, adjust the vents for proper airflow and maintain a consistent cooking temperature throughout.
Cooking the turkey
I start by lighting the charcoal and placing it on one side of the grill. Next, I prepare the turkey by patting it dry with paper towels and seasoning it with salt and pepper. Then, I place a V-rack or roasting rack in a roasting pan and transfer the turkey onto the rack. After that, I put the plate setter in the grill to create an indirect heat zone. Once the grill temperature reaches 325°F (163°C), I place the roasting pan with the turkey on the side without charcoal, close the lid, and let it cook for several hours until it reaches an internal temperature of 165°F (74°C). Finally, I remove the turkey from the grill, cover it with foil, and let it rest for 20 minutes before carving.
Allowing the turkey to rest
After cooking the turkey on the charcoal grill, I transfer it to a clean platter and loosely cover it with foil. Then, I let it rest for about 20-30 minutes. This allows the juices to redistribute evenly throughout the meat, ensuring a moist and flavorful bird when carved.
During this time, I use the opportunity to prepare side dishes or make gravy using the delicious drippings from the grilled turkey. The resting period also gives me some time to set up the serving table and gather my guests, creating an exciting build-up before unveiling the perfectly grilled turkey for everyone to enjoy.
Tips and Tricks for Grilling a Perfect Turkey
Maintaining temperature is crucial for a perfectly grilled turkey, and achieving a crispy skin while preventing the meat from drying out can be challenging, but with these tips and tricks, you’ll master the art of grilling a delicious turkey every time.
Read on to learn more!
How to maintain temperature during cooking
To maintain the temperature during cooking, use a charcoal grill with a good lid to trap heat. Position the air vents to control airflow and regulate the temperature inside. Add more preheated charcoal to increase heat or adjust the vents slightly for lower temperatures.
Place a water pan between the coals for indirect heat, which helps stabilize and distribute temperature while adding moisture.
Monitoring the grill’s internal temperature is important too, using an external thermometer inserted into the vent or through a small hole at grill level can help ensure consistent cooking temperatures throughout.
How to achieve a crispy skin
To achieve a crispy skin on the grilled turkey, pat the bird dry with paper towels before seasoning it. Rub softened butter or oil all over the turkey’s skin and season generously with salt and pepper.
Additionally, to enhance crispiness, consider air-drying the turkey in the refrigerator overnight uncovered, allowing the skin to become drier for a better texture when cooked on the grill.
After preparing your turkey for grilling, ensure that you preheat your charcoal grill to around 375°F. Directly place your seasoned and dried bird into an indirect heat zone of your grill using a roasting pan or V-rack.
Then let it cook with little disruption until it reaches an internal temperature of 165°F at its thickest part. Once done, remove from heat and rest for about 20 minutes before carving.
How to prevent the turkey from drying out
After achieving a crispy skin, the next challenge is to prevent the turkey from drying out during grilling. Keeping the charcoal grill temperature consistent and using a leave-in thermometer to monitor the internal temperature of the turkey is crucial for preventing it from becoming dry.
Basting with butter or olive oil every hour also helps keep the meat moist and flavorful while cooking on indirect heat. Lastly, covering the turkey with aluminum foil for the first half of cooking can help retain moisture before uncovering for that perfect golden brown finish.
By monitoring temperature, basting regularly, and using foil strategically, you can ensure your grilled turkey stays juicy and succulent throughout the cooking process.
Cleanup and Serving
After the turkey is cooked and rested, it’s time to clean up the grill. I’ll also share some tips for serving the delicious grilled turkey and making gravy with the drippings.
Tips for easy cleanup
I find that cleaning up after grilling a turkey on a charcoal grill can be made easier with these tips:
- Line the drip pan with aluminum foil to catch drippings and make cleanup quicker.
- Use a wire brush to clean the cooking grate once it has cooled down.
- Scrub the inside of the grill with warm soapy water and a sponge to remove any grease or residue.
- Dispose of used charcoal and ash in a designated metal container once they have completely cooled.
- Store leftover wood chips in a dry place for future use, or dispose of them responsibly if no longer needed.
- Wipe down the exterior of the grill with a damp cloth to keep it looking clean and well – maintained.
To carve or not to carve on the grill
Once the turkey has rested, a decision must be made whether to carve it on the grill or transfer it indoors for carving. My preference is to bring the turkey inside for carving as it allows for more space and an easier cleanup.
Plus, you can use all those delicious drippings in your gravy-making process!
Make sure that you have a sturdy cutting board ready when bringing the turkey into your kitchen. It’s best to let the bird rest for about 15-20 minutes before carving so that it remains juicy and flavorful.
How to make gravy with the grilled turkey
Once the grilled turkey is ready, making gravy to accompany it is essential. To make gravy with the drippings from the grilled turkey, start by straining the pan drippings into a saucepan to remove any solids.
Heat the drippings over medium heat and whisk in a mixture of flour and water to create a smooth paste, then slowly add chicken or turkey broth while continuously whisking until the desired consistency is reached.
Season with salt and pepper as needed, and let it simmer for a few minutes before serving.
Conclusion
In conclusion, grilling a turkey on a charcoal grill is an excellent way to infuse delicious smoky flavors into your meat. With the right equipment and cooking techniques, achieving a juicy and flavorful turkey is within reach.
So next time you’re thinking about roasting a turkey, consider taking it outdoors and trying this fantastic method for mouthwatering results. Happy grilling!
FAQs
1. What do I need to know about cooking a turkey on a charcoal grill?
When you’re ready to cook a turkey on a charcoal grill, you’ll use indirect heat grilling and monitor the grilled turkey temperature carefully for delicious outdoor roasting.
2. Can I get that oven-grilled flavor with a charcoal grill?
Absolutely! You can achieve an oven-grilled taste by using slow-grilled turkey methods on your charcoal grill, which gives the whole turkey barbecue flavor.
3. Is it possible to just cook a turkey breast on the grill?
Yes, you can focus on grilling just the turkey breast if preferred. Make sure to watch the grilled turkey temperature closely and adjust your charcoal grilling techniques as needed.
4. How long does it take to cook a whole turkey on a gas or charcoal grill?
The cooking time varies depending on size but expect several hours of cooking when using either gas or charcoal grills; patience is key for that ideal Thanksgiving turkey grilling experience!
5. Besides culinary skills, what’s important for successful outdoor turkey roasting?
For top-notch poultry results, mastering both your cooking method and control over temperature are essential components in addition to applying your culinary skills while engaging in outdoor cooking activities.
Learn More About Grilling
If you want to learn more about grilling, check out these other helpful resources!

Kevin Turner
Hi there, I'm Kevin Turner, Founder and CEO of thegrillingmaster.com. I started this website to share my passion and knowledge with you. You can leverage my years of experience as a pit master and professional to grill great food!
About The Grilling Master
Hi there, I'm Kevin Turner, Founder and CEO of thegrillingmaster.com.
My passion has always been grilling, smoking and BBQ delicious meats that satisfy my inner carnivore!
I started this website to share my passion and knowledge with you, the hungry reader who wants to prepare the perfect meal.
You can leverage my years of experience as a pit master and professional.
Send me a message and let's connect on Twitter here.


