How to Clean a Charcoal Grill
TheGrillingMaster.com is reader-supported. If you buy something using the links on our site, we might earn an affiliate commission at no added cost to you. This helps us pay our staff to keep making awesome content for you!
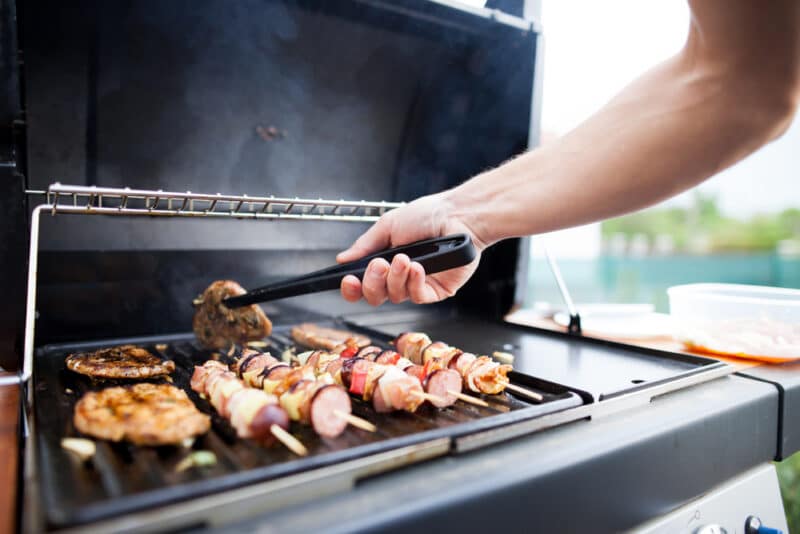
There’s nothing I love more than firing up my charcoal grill on a sunny day, the aroma of sizzling food filling the air.
But over the years, I’ve learned that the secret to the perfect BBQ isn’t just in the marinade or the coals—it’s in the care we give our grills. I can’t stress enough how vital a clean grill is.
Not only does it make your food taste better, but it also prolongs the life of your beloved BBQ equipment and ensures safety.
Trust me, I’ve seen the aftermath of neglect: unwanted flavors, uneven heating, and even dangerous flare-ups.
Here I’ve put together this guide to share my tried-and-true methods for keeping a charcoal grill in top-notch condition. Let’s dive in and get that grill sparkling.
Gather Necessary Cleaning Supplies
Before diving into the cleaning process, I always make sure I have all the necessary supplies on hand. It’s a bit like prepping ingredients before cooking—a little organization goes a long way. Over the years, I’ve refined my list of essential tools and materials to ensure a thorough and efficient cleaning. Here’s what I gather:
1. Grill Brush or Scrubbing Pad:
The first thing I grab is a good quality grill brush. It’s indispensable for scrubbing off those stubborn bits of charred food and grease. If you don’t have one, a heavy-duty scrubbing pad can work in a pinch. Just ensure it’s tough enough to handle the grime without falling apart.
2. Dish Soap or Grill Cleaner:
Some folks swear by specialized grill cleaners, and I’ve used a few that work wonders. However, a good old dish soap can be just as effective. It’s gentle on the grill, yet tough on grease. I usually opt for a soap that’s known for cutting through grease.
3. Bucket or Bowl:
I fill a bucket or a large bowl with warm water. This will be used to mix with the dish soap and to rinse the scrubbing pad or brush as I go along.
4. Warm Water:
Warm water is more effective at breaking down grease and grime than cold water. I ensure I have a steady supply, either from a tap nearby or by filling up a large container.
5. Disposable Gloves:
Cleaning a grill can be a messy job, and I prefer to keep my hands clean and protected. A pair of disposable gloves does the trick. They also protect my hands from any harsh cleaning agents or sharp edges.
6. Paper Towels or Old Rags:
Once the scrubbing is done, I use paper towels or old rags to wipe down the grill and remove any excess water or soap. They’re also handy for spot cleaning.
7. Vinegar (optional for deep cleaning):
For those times when my grill needs some extra TLC, I turn to vinegar. A mixture of equal parts water and vinegar can tackle even the most stubborn stains. It’s a natural cleaning agent that I’ve found to be incredibly effective, especially when combined with a bit of elbow grease.
Gathering these supplies might seem like a simple step, but it’s one that sets the tone for the entire cleaning process. With everything within arm’s reach, I can focus on the task at hand without any interruptions. Over the years, I’ve learned that a well-prepared cleaning session is a successful one. So, before you roll up your sleeves and get to scrubbing, take a moment to ensure you have everything you need. Your grill (and your future BBQs) will thank you.
Keep in mind that if you use too much charcoal in your grill – it’s going to cause a mess.
Safety First
Whenever I approach my grill, especially for cleaning, I’m reminded of a mantra that’s been ingrained in me since my early grilling days: safety first. It’s easy to get caught up in the excitement of a BBQ or the satisfaction of scrubbing away months of grime, but without proper precautions, things can go south quickly. Here’s how I ensure I’m always safe when cleaning my charcoal grill:
1. Cool to the Touch:
Before even thinking about cleaning, I always make sure my grill is completely cool. It might sound obvious, but I’ve heard stories of eager grillers getting burned by residual heat. I usually wait several hours after my last grilling session, or even until the next day, to be certain.
2. Charcoal and Ash Removal:
Once I’m sure there’s no lingering heat, I start by removing any leftover charcoal and ash. This not only makes the cleaning process smoother but also prevents ash from turning into a sludgy mess when it comes into contact with water or cleaning solutions. Using gloves, I carefully discard the remnants in a metal container.
3. Disconnect Propane or Gas (for hybrid grills):
While I primarily use a charcoal smoker or grill, I’ve dabbled with hybrid models in the past. If you’re using one, always remember to disconnect any propane or gas sources. It’s a step that’s easy to overlook, but it’s crucial for safety. Even if you’re certain there’s no gas flow, it’s better to be safe than sorry.
4. Stable Cleaning Surface:
I’ve learned the hard way that a wobbly grill can lead to spills, slips, and other accidents. Before I begin cleaning, I ensure my grill is on a stable surface. If I’m cleaning parts separately, I lay them out on a flat, stable table or ground area.
5. Protective Gear:
Beyond the disposable gloves I mentioned earlier, I sometimes wear safety goggles, especially if I’m using any strong cleaning agents or if there’s a risk of splashing. It might seem over-the-top, but I value my eyesight!
6. Ventilation:
If I’m using any commercial grill cleaners, I always make sure I’m in a well-ventilated area. Some cleaners can emit fumes that are harmful if inhaled in large amounts. I either clean outdoors or ensure I’m in a space with plenty of fresh air.
Cleaning a grill is a rewarding experience, especially when you see it gleaming and ready for the next BBQ session. But it’s essential to remember that safety should always come first. Over the years, these steps have become second nature to me, ensuring that I can enjoy my grilling adventures without any hitches. So, before you dive into the nitty-gritty of cleaning, take a moment to prioritize your safety. It’s the foundation of every great BBQ experience.
Related Reading>> 5 Best Pellet Smokers
Beginner Mistake when Cleaning a Grill
Cleaning the Grate
Ah, the grate—the heart of the grill and the stage for countless BBQ masterpieces. Over time, it becomes a canvas of charred remnants and memories of meals past. But as nostalgic as those marks can be, a clean grate is essential for optimal grilling. Here’s how I tackle this crucial component:
1. Dry Brushing:
Before introducing any water or cleaning solutions, I give the grate a good dry brushing. Using my trusty grill brush, I scrub away any loose particles and charred bits. This initial step makes the subsequent cleaning much more manageable. If you don’t have a grill brush, a ball of aluminum foil held with tongs can be a makeshift alternative.
2. Soapy Soak:
Next, I prepare a mixture of warm water and dish soap in my bucket. The warmth of the water helps in breaking down the grease, while the soap tackles the stubborn residues. I submerge the grate in this mixture, letting it soak for about 30 minutes. If your grate is too large for a bucket, you can lay it on a flat surface and generously lather the soapy water mixture onto it.
3. Scrubbing Time:
After the soak, it’s time to get down to business. With gloves on, I take the grate out and scrub it using the grill brush or scrubbing pad. I pay special attention to areas with thick buildup, ensuring every nook and cranny is addressed. The combination of the soapy soak and vigorous scrubbing usually does the trick, even for the most stubborn grime.
4. Rinsing and Drying:
Once I’m satisfied with the scrubbing, I rinse the grate thoroughly with clean water. It’s essential to ensure all soap residues are washed away, as they can affect the taste of food during your next grilling session. After rinsing, I let the grate air dry. If I’m in a hurry, I pat it down with paper towels or old rags, but air drying is my preferred method to prevent rusting.
5. Seasoning (Optional):
For those who want to go the extra mile, seasoning the grate can be a game-changer. Once it’s dry, I lightly coat it with cooking oil, ensuring an even layer. This not only prevents rust but also creates a non-stick surface for the next grilling adventure.
Cleaning the grate might seem like a chore, but it’s a labor of love for me. Every time I restore it to its gleaming glory, I’m reminded of the delicious dishes it will soon hold. Plus, there’s an undeniable satisfaction in seeing the transformation from a grimy grate to a pristine one.
Cleaning the Grill Interior
Diving into the belly of the beast, the grill’s interior is where the magic truly happens. But it’s also where ash, grease, and food remnants love to hide. Over the years, I’ve realized that while the grate gets most of the attention, the interior is equally deserving of care.
After ensuring the grate is set aside, I begin by addressing the ash catcher. This little component, often overlooked, plays a pivotal role in maintaining a clean and efficient grill. I empty it out, making sure to dispose of the ash safely. Ash, when mixed with moisture, can turn into a lye-like substance, so I ensure it’s kept away from children and pets.
With the ash catcher clean, I turn my attention to the walls of the grill. These can become coated with layers of grease and smoke residue over time. Using a mixture of warm water and dish soap, I scrub the walls gently but firmly with a scrubbing pad. Circular motions work best, helping to lift and remove the buildup. It’s a therapeutic process, watching the walls return to their former glory, free from the layers of past BBQs.
The bottom of the grill often holds a mix of ash and grease. I make sure to clean this thoroughly, ensuring no remnants are left behind. A spatula or scraper can be handy here, helping to lift off any thick deposits.
Once the interior is spotless, I rinse it out with clean water. It’s essential to remove any soap residue to prevent unwanted flavors during the next grilling session. I then leave the grill open to air dry, letting nature do its work.
Cleaning the Grill Exterior
After dedicating time to the grill’s interior, I always find a moment of calm in addressing the exterior. It’s the face of the grill, the part that everyone sees, and over time, it too collects its share of smudges, dust, and occasional sauce splatters from enthusiastic BBQ sessions.
Starting at the top, I gently wipe down the lid. It often bears the brunt of the elements, especially if the grill is stored outdoors. A mixture of warm water and a drop of dish soap on a soft cloth works wonders here. It’s gentle enough not to scratch the surface but effective in removing dirt and grease. I’ve always believed that the lid sets the tone for the entire grill, and a clean, gleaming lid is an invitation to grill.
Moving downwards, I pay special attention to handles, knobs, and other touchpoints. These areas, frequently handled, can accumulate grease and grime faster than other parts. A soft brush or old toothbrush can be particularly useful in getting into the crevices and ensuring every spot is clean.
The main body and legs of the grill, though not always dirty, benefit from a gentle wipe down. It helps in removing any dust or pollen, especially during those spring and summer months.
Lastly, I address the wheels or base, depending on the grill type. These areas, being closest to the ground, can often collect a fair amount of dirt. A quick scrub ensures they’re in top shape, ready to move or stand firm for the next BBQ session.
Once the exterior is cleaned, I take a step back to admire the grill in its entirety. There’s a sense of pride in seeing it gleam, almost like it’s fresh out of the box. It’s a reminder that with a little care and attention, our grilling companions can serve us well for years, looking as good as they perform.
Addressing Rust Spots
Rust: the arch-nemesis of any grill enthusiast. Over time, even with the best care, rust can make an appearance. But fear not, for I’ve battled this foe many times and have a few tricks up my sleeve:
1. Spot Identification:
The first step is always to inspect the grill thoroughly. I look for any signs of rust, no matter how small. Early detection can make the removal process much easier.
2. Baking Soda Solution:
One of my go-to remedies is a mixture of baking soda and water. I create a paste and apply it directly to the rust spots. Letting it sit for a few hours, the baking soda works its magic, breaking down the rust.
3. Scrubbing:
After allowing the baking soda paste to sit, I use a scrubbing pad or an old toothbrush to gently scrub the rusted areas. With a bit of elbow grease, the rust usually starts to lift away, revealing the clean metal beneath.
4. Vinegar Soak (for smaller parts):
For smaller grill parts with rust, I sometimes use a vinegar soak. Submerging the parts in white vinegar for a few hours can help dissolve the rust. After soaking, a quick scrub usually removes any lingering rust particles.
5. Rust Remover:
For particularly stubborn rust spots, I turn to commercial rust removers. While I prefer natural methods, sometimes you need a bit more power. Always remember to use gloves and work in a well-ventilated area when using chemicals.
6. Protective Coating:
Once the rust is removed, I like to apply a protective coating to the affected areas. This can be a specialized rust-proof paint or even a light layer of cooking oil. It acts as a barrier, preventing future rust formation.
7. Regular Checks:
The key to managing rust is prevention. I make it a habit to regularly inspect my grill, especially after rainy seasons or if it’s been stored for a while.
Rust might seem like a formidable opponent, but with the right tools and a bit of persistence, it’s entirely manageable. Remember, a rust-free grill not only looks better but also ensures a safer and more delicious grilling experience.

Reassembling the Grill
After the thorough cleaning, the moment of truth arrives: putting my beloved grill back together. It’s like completing a jigsaw puzzle, where each piece has its place, ensuring the grill is ready for its next culinary adventure. Here’s how I go about it:
1. Check for Dryness:
Before I start reassembling, I ensure all parts are completely dry. This is crucial to prevent any rust formation. If I’m in a hurry, I might use a cloth to pat down parts, but air drying is always my top choice.
2. Grate Placement:
The grate, now gleaming and clean, is the first to go back. I ensure it sits snugly in its designated position, ready to hold the delicacies I’ll grill next.
3. Ash Catcher:
The emptied and cleaned ash catcher is reattached. It’s a small component, but vital for ensuring a clean grilling environment.
4. Reconnect Gas (for hybrid grills):
If I’m working with a hybrid grill, this is when I carefully reconnect the propane or gas sources. I double-check all connections to ensure there are no leaks or loose parts. This is critical for all gas grills.
5. Exterior Components:
Handles, knobs, and other detachable exterior parts are reattached. I ensure they’re secured tightly, ensuring smooth operation during my next BBQ session.
6. Test Run:
Before declaring my cleaning mission complete, I like to do a quick test run. I’ll light up the grill, ensuring everything is working as it should. This step also helps burn off any residual cleaning agents that might have been missed during rinsing.
7. Final Inspection:
With everything in place, I take a step back and give my grill a once-over. It’s a moment of pride, seeing it restored to its former glory, ready for countless more grilling sessions.
Maintenance Tips for a Longer-Lasting Grill
Regular Ash Disposal:
One of the simplest yet most effective habits I’ve adopted is regularly emptying the ash catcher. Ash, when left to accumulate, can trap moisture, leading to rust. After each grilling session, I make it a point to dispose of the ash, ensuring the grill remains clean and rust-free.
Proper Storage:
The environment where the grill is stored plays a significant role in its longevity. I always ensure my grill is stored in a dry place, away from direct exposure to harsh weather elements. If I leave it outdoors, I invest in a good quality grill cover. It acts as a shield, protecting the grill from rain, dust, and even the sun’s UV rays.
Post-Grilling Routine:
Over the years, I’ve realized the importance of a post-grilling routine. Instead of waiting for grime to accumulate, I give the grill a quick clean after every use. Using a grill brush, I scrub off any food residues while the grill is still warm (but not hot). This simple act prevents buildup and makes the deep cleaning sessions much more manageable.
Avoiding Harsh Chemicals:
While there are many commercial grill cleaners available, I’m cautious about the products I use. Harsh chemicals can leave residues that might affect the taste of the food. I often opt for natural cleaning agents like vinegar or baking soda. Not only are they effective, but they also ensure my grill remains free from harmful chemicals.
Regular Inspections:
Lastly, I’ve made it a habit to inspect my grill regularly. I look out for signs of wear and tear, rust spots, or any malfunctioning components. Early detection often means easier fixes, ensuring my grill remains in top shape for years.
Maintaining a grill might seem like a chore to some, but for me, it’s a labor of love. Each of these practices ensures that my trusty grill companion remains efficient, safe, and ready to deliver delicious meals. After all, a well-maintained grill is the cornerstone of every memorable BBQ.
Conclusion
Reflecting on the Journey:
As I stand back and admire my freshly cleaned grill, I’m reminded of the countless meals, laughter, and memories it has facilitated. The cleaning process, while thorough, is more than just a chore—it’s a testament to the respect and care I have for this culinary companion.
The Importance of Regular Care:
Over the years, I’ve come to understand that regular maintenance goes beyond aesthetics. A clean grill ensures that every dish I prepare is of the highest quality, free from unwanted residues or flavors. More than that, it guarantees safety, preventing potential hazards like flare-ups from grease build-up.
Ready for More Adventures:
With each cleaning session, I breathe new life into my grill, preparing it for more BBQ adventures. Whether it’s a simple weekend cookout or a grand summer BBQ party, I can now approach each event with confidence, knowing my grill is in its best condition.
Passing on the Torch:
I often think about the next generation of grill enthusiasts—those who are just starting their BBQ journey. My hope is that they too will recognize the importance of caring for their grills. It’s not just about prolonging the life of the equipment; it’s about honoring the tradition of grilling, ensuring each meal is a masterpiece.
Final Thoughts:
Grilling is more than just a method of cooking; it’s a passion, a tradition, and for many, a way of life. And like any passion, it demands respect and care. So, as you fire up your grill for the next session, remember the effort you’ve put into maintaining it. Trust me, the results—delicious, perfectly grilled dishes—will be worth every scrub, wipe, and rinse. Happy grilling folks.
Learn More About Grilling
If you want to learn more about grilling, check out these other helpful resources!

Kevin Turner
Hi there, I'm Kevin Turner, Founder and CEO of thegrillingmaster.com. I started this website to share my passion and knowledge with you. You can leverage my years of experience as a pit master and professional to grill great food!
About The Grilling Master
Hi there, I'm Kevin Turner, Founder and CEO of thegrillingmaster.com.
My passion has always been grilling, smoking and BBQ delicious meats that satisfy my inner carnivore!
I started this website to share my passion and knowledge with you, the hungry reader who wants to prepare the perfect meal.
You can leverage my years of experience as a pit master and professional.
Send me a message and let's connect on Twitter here.


